Do You Want Your Balance to Perform at Its Best? Get It Serviced by the Market Leader
Do You Want Your Balance to Perform at Its Best? Get It Serviced by the Market Leader
Test Weights FAQ
What are test weights for balances?
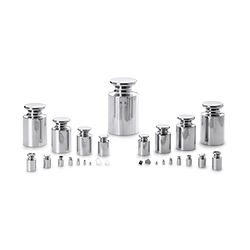
Test weights for balances are standardized masses used to verify the accuracy of weighing instruments. They come in various classes and are essential for ensuring reliable measurements in laboratories and industrial settings.
What are the differences between OIML and ASTM test weight classes?
Weight classes are separated according to the error limits that are classified either according to OIML (International Organization of Legal Metrology) or ASTM (American Society for Testing and Materials) declarations as follows.
The OIML weight
- Class E1 weights are intended to ensure traceability between national mass standards and weights of class E2 and lower (i.e. F1 and F2). Class E1 weights or weight sets shall be accompanied by a calibration certificate.
- Class E2 weights are intended for use in the initial verification of class F1 weights and for use with weighing instruments of accuracy class I. Class E2 weights or weight sets shall always be accompanied by a calibration certificate. They may be used as class E1 weights if they comply with the requirements for surface roughness and magnetic susceptibility and magnetization for class E1 weights (and their calibration certificate gives the appropriate data).
- Class F1 weights are intended for use in the initial verification of class F2 weights and for use with weighing instruments of accuracy class I and class II.
- Class F2 weights are intended for use in the initial verification of class M1 and possibly class M2 weights. They are also intended for use in important commercial transactions (e.g. precious metals and stones) on weighing instruments of accuracy class II.
- Class M1 weights are intended for use in the initial verification of class M2 weights and for use with weighing instruments of accuracy class III.
- Class M2 weights are intended for use in the initial verification of class M3 weights and for use in general commercial transactions and with weighing instruments of accuracy class III.
- Class M3 weights are intended for use with weighing instruments of accuracy class IIII.
- Classes M3 and M2-3 are lower accuracy weights of 50 kg to 5 000 kg and are intended for use with weighing instruments of accuracy class III.*
*The error in a weight used for the verification of a weighing instrument shall not exceed one third of the maximum permissible error (MPE) for an instrument. These values are listed in section 3.7.1 of OIML International Recommendation 76 Non-automatic Weighing Instruments (1992).
ASTM Weight
- ASTM Class 0: Used as primary reference standards for calibrating other reference standards and weights.
- ASTM Class 1: Can be used as a reference standard in calibrating other weights and is appropriate for calibrating high-precision analytical balances with a readability as low as 0.1 mg to 0.01 mg.
- ASTM Class 2: Appropriate for calibrating high-precision top loading balances with a readability as low as 0.01 g to 0.001 g.
- ASTM Class 3: Appropriate for calibrating balances with moderate precision with a readability as low as 0.1 g to 0.01 g.
- ASTM Class 4: For calibration of semi-analytical balances and for student use.
- NIST Class F: Primarily used to test commercial weighing devices by state and local weights-and-measures officials, device installers and service technicians.
Why should I use certified test weights?
ASTM class 0 and ultra-class as well as OIML class "E0" and E1 should be used for the highest level of precision i.e. mass standards (calibrating other weights), micro-balance testing and calibration, and critical weighing applications.
ASTM classes 1 & 2 and OIML classes E2 & F1 should be used for precision applications i.e. analytical balance testing and calibration.
ASTM classes 3 & 4 and OIML classes F1 & F2 are best suited to top-loading balance calibrations and testing and moderate precision applications (laboratory non-critical).
Note: If a balance or scale is calibrated, the weight set used and the class must be documented.
How to use a test weight set for routine balance testing?
For routine testing, specially designed CarePac sets are recommended and the nominal value should suffice for most process requirements. The tests to be carried out depend on the criticality of the weighing process. Based on a risk assessment, a GWP® Verification provides information for routine testing frequency. It also provides a calibration schedule and maintenance plan tailored to your specific processes and risks. SOPs are available to help you determine adequate testing procedures.
What are the benefits of using stainless steel test weights?
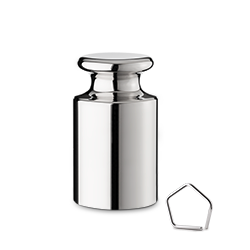
Stainless steel weights have long-term stability. All METTLER TOLEDO weights are made of premium stainless steel to make them corrosion resistant. Monobloc weights are specially designed for long-term stability and weights with an adjusting cavity provide the best value for the money. Electrolytic polishing ensures glossy surfaces for anti-adhesion effects.
Why and how often do I need to recalibrate my test weights?
Accurately calibrated test weights are the basis of accurate weighing results. The accuracy of test weights becomes less reliable over time. This is the result of normal wear and tear caused by regular use, dirt and dust. Periodic recalibration of test weights at an accredited mass-calibration laboratory is essential to ensure ongoing traceability. At our accredited mass-calibration laboratories, we clean, calibrate, and adjust each weight and then document the results in a calibration certificate. Our calibration services cover the basic reporting of conventional mass correction, uncertainty and traceability information in accordance with ISO/IEC 17025 requirements.
The frequency with which to recalibrate your test weights depends on the criticality of the weighing process. A GWP® Verification provides not only recommendations on how to calibrate, test and maintain your weighing instrument. It advises on selecting the correct test weight and weight class and also provides recommendations on how often to recalibrate your test weights. All of this information is determined based on your specific processes and risks.
As a risk-based service, GWP® Verification helps to eliminate redundant or erroneous testing. Furthermore, it provides a complete set of audit-proof documentation to safeguard your full compliance with regulatory requirements.
What are sub-milligram weights?
Microgram weights were made available by METTLER TOLEDO in response to increasing customer demands for values below one milligram. Weights are packaged with specially designed accessory sets and handling tools to provide a complete solution for operators who go beyond traditional weighing boundaries.
These weights are also traceable and therefore have certified values which are necessary for critical applications such as those used in nanotechnology. Download the white paper on micro-weights to learn more.
What are buoyancy artefacts?
Air density is usually calculated from relevant air parameters such as air temperature, pressure, humidity and CO2 concentration. An alternative method of determining air density may be applied by utilizing two specially designed buoyancy artefacts. Both artefacts are compared in vacuum and in air. By comparing the two artefacts of identical nominal weight, the large volume difference reflects the air buoyancy and therefore results in a highly accurate determination of air density. The buoyancy artefacts are mainly used for the M_one vacuum mass comparator.
Why is a silicon sphere used for specialized volume measurement?
Spheres are used because the volume can be determined according to the definition of volume by a length measurement. Silicon (Si) spheres have the same homogenous atomic structure as a perfect diamond without voids or dislocations, so the density is more accurate than other materials. This is why a silicon sphere with a homogenous atomic structure serves as a reference for specialized volume measurement.
What are heavy-capacity test weights used for?
Mass comparators go up to a capacity of six tons. Industrial scales go up to several hundred tons. Heavy-capacity weights—typically those in the range of 200 kg, 500 kg, 1 t and 2 t are used for sensitivity, eccentricity, linearity and repeatability testing of these higher-capacity devices. Weights are less than 2 t due to the maximum lifting capability of machines, typically forklifts and cranes. However, these weights can be combined to reach the desired weight. Professional weights such as METTLER TOLEDO’s have lifting hooks and design features that allow them to be lifted by forklift. Barrel (round) weights are illegal as they roll and could injure a service technician.
Heavy-capacity weights must be transported in heavy-duty trucks and it is important to ensure trucks do not exceed their rated load limit due to safety and government regulations. Heavy-capacity weights are generally constructed of cast iron not stainless steel due to the cost.
What is the weighing scale tolerance limit of any scale? Can all scales offer precision weights?
This is the required accuracy of the scale, and specifically the tolerance of inaccuracy allowed before it is out of tolerance and in need of a weigh scale calibration by certified calibration weights. A calibrated scale will operate at a higher level of accuracy and maintain tolerance better. For this reason, weight scale calibration with certified weights for keeping the weighing scale tolerance limit is key for accurate, calibrated scales and weigh scale calibration. Learn more about keeping your weighing scale tolerance limit in your weighing processes.
What do you use to calibrate a scale?
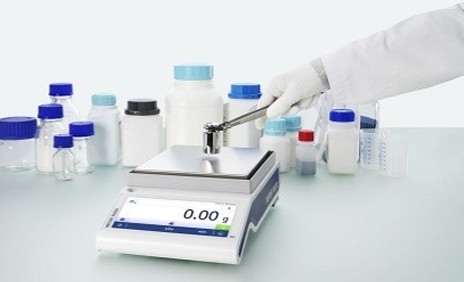
Large stainless-steel test weights of up to 2 tons can be used to calibrate scales from small bench scales to large heavy capacity floor scales. METTLER TOLEDO offers an extensive weight portfolio for calibration, covering weights from 1 milligram to 5 tons in all accuracy classes. From grip-handle weights to cylindrical weights, each type of test weight offers its own set of benefits during scale calibration and recalibration.
Where to buy calibration weights?
METTLER TOLEDO offers calibration weights in different masses in both OIML and ASTM standards - check our Calibration Weights.
What is plus tolerance of test weights?
Weights are calibrated according to OIML maximum permissible errors (+/- in mg). If the result of the calibration is in the plus range, it means that the weight is heavier than the specified nominal value, but still within the tolerance. Since most weights lose weight over time due to wear, it is more likely that this weight will take longer to fall out of tolerance (maximum permissible error). Through our production processes, most of our weights are calibrated in the plus range.
What is routine testing with test weights?
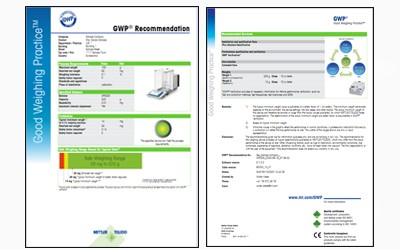
A routine test can be compared to work which you perform yourself on your car in-between the maintenance service, like checking the oil or tire pressures. To perform a routine test on your balance, we recommend using two weights. For customers who do not know which weights are suitable for their application or balance, we are happy to advise. For this purpose, there is a so-called GWP® Recommendation or verification software, which your METTLER TOLEDO contact can use, so that the customer then knows which weights, in terms of OIML or ASTM class and the correct mass needed for their application.
In what packaging units can I buy weights?
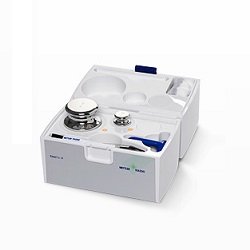
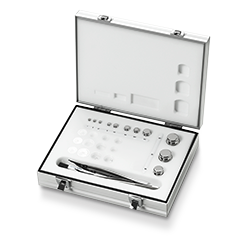
We provide the weights as single weights, in a CarePac or weight set with or without a calibration certificate.
- 100g Calibration Weights
- 10kg Calibration Weights
- 1kg Test Weights
- 200g Calibration Weights
- 20kg Test Weights
- 500g Calibration Weights
- 50kg Test Weights
- 5kg Calibration Weights
- Calibration Weight Sets
- Calibration Weights
- CarePac®
- Class F Test Weights
- E2 OIML Class Calibration Weights
- F1 OIML Class Test Weights
- Lab Weights - Calibration & Testing
- M1 OIML Class Calibration Weights
- Reference Weights and Microgram Weights
- Single Test Weights
- Weight Sets
